- Revised – October 16, 2019
After shooting hundreds of focus shift images I’ve updated this article to include my latest results and my current thinking on the subject—although my overall opinion hasn’t changed: focus-shift shooting is still the most significant advance on Nikon pro cameras to date, including both the Z6 and the Z7 mirrorless cameras—everything here also applies to them. To appreciate the immense depth of field of the images posted here, you need to view them as large as possible. Follow this link for my latest focus shift shooting project using the Z7 to photograph the fall colors of Central Massachusetts.
What it is, what it does, and how to use it
Perhaps the most exciting new feature of the Nikon D850 is Focus shift shooting—found in the Photo Shooting menu. When I first bought the Nikon D850, I could hardly wait to use the Focus Shift feature. And having used it I have discovered that I can create images that would otherwise be impossible to make. Yes, focus shift can be done manually on any camera with any lens, but it takes a lot of calculation and experimentation to get it right. Even using the focus shift feature on the D850 is a little complicated and time-consuming, at first. But, that said, it just takes patience and practice. A little of both.
Before you start—not all lenses will work. You need to have a compatible lens, the equivalent of a Nikon AF-S or AF-P lens. The older D lenses will not work, and that goes for older non-OEM D lenses from Tamron, Tokina and Sigma and others. If it has an aperture ring it won’t work.
Here’s Nikon’s Professional Services definition of the D850 Focus Shift feature:
“Focus stacking” combines photos shot at different focus positions into a single image with increased depth of field. The D850’s new focus shift feature, which automatically varies focus over a series of shots, is used to take photos that will later be combined using focus stacking.
Focus shift automatically shifts the focus of your lens for a set number of shots from close focus to as far as infinity. In other words, if you have a landscape scene that you want in focus from foreground to the distant horizon (infinity), or you’re shooting macro and have a butterfly you want in focus from its antennae to its tail, but you can’t get it all in focus even stopping down to f/32 on your macro lens, you can take a series of exposures, focusing and then refocusing in steps, starting with the foreground, and then re-focusing a little farther out towards the background each time until you reach infinity, or the final point you want to be in focus. You can do that manually with any camera and lens with manual focus, but the D850 Focus Shift feature does it for you when you use a lens with auto focus.
Important Note: If “Focus shift shooting” is grayed out in your menu and you get an error message, it means you have Auto bracketing or Multiple exposures active—turn them off.
Now, let’s talk about it in more detail. There are essentially two parts to the Focus Shift feature; focus shift when shooting, and focus stacking when post processing using Lightroom®, Photoshop® or another photo-editing program to align and blend the images into one final image. I use Photoshop. Let’s consider one scenario.
You have a flower pot full of flowers and it is about 14 inches in diameter. You want all the flowers in focus and sharp, but not the fence and railing behind the flower pot.
-
Set up your camera on a tripod (always use a tripod), compose your photograph, focus on the closest plane (the edge of the pot, a flower petal, a leaf, etc.) that you want in focus.
-
It’s recommended that you stop down 1-3 stops from wide open to assure sharpness and good contrast out to the edges.
-
Set your exposure—you can set it manually so that each exposure will be the same, as long as there isn’t a cloud passing over or the setting of the sun isn’t imminent or you can also use “A” (automatic exposure—aperture priority), as I do most of the time.
-
Set the focus shift settings in the menu and click on Start
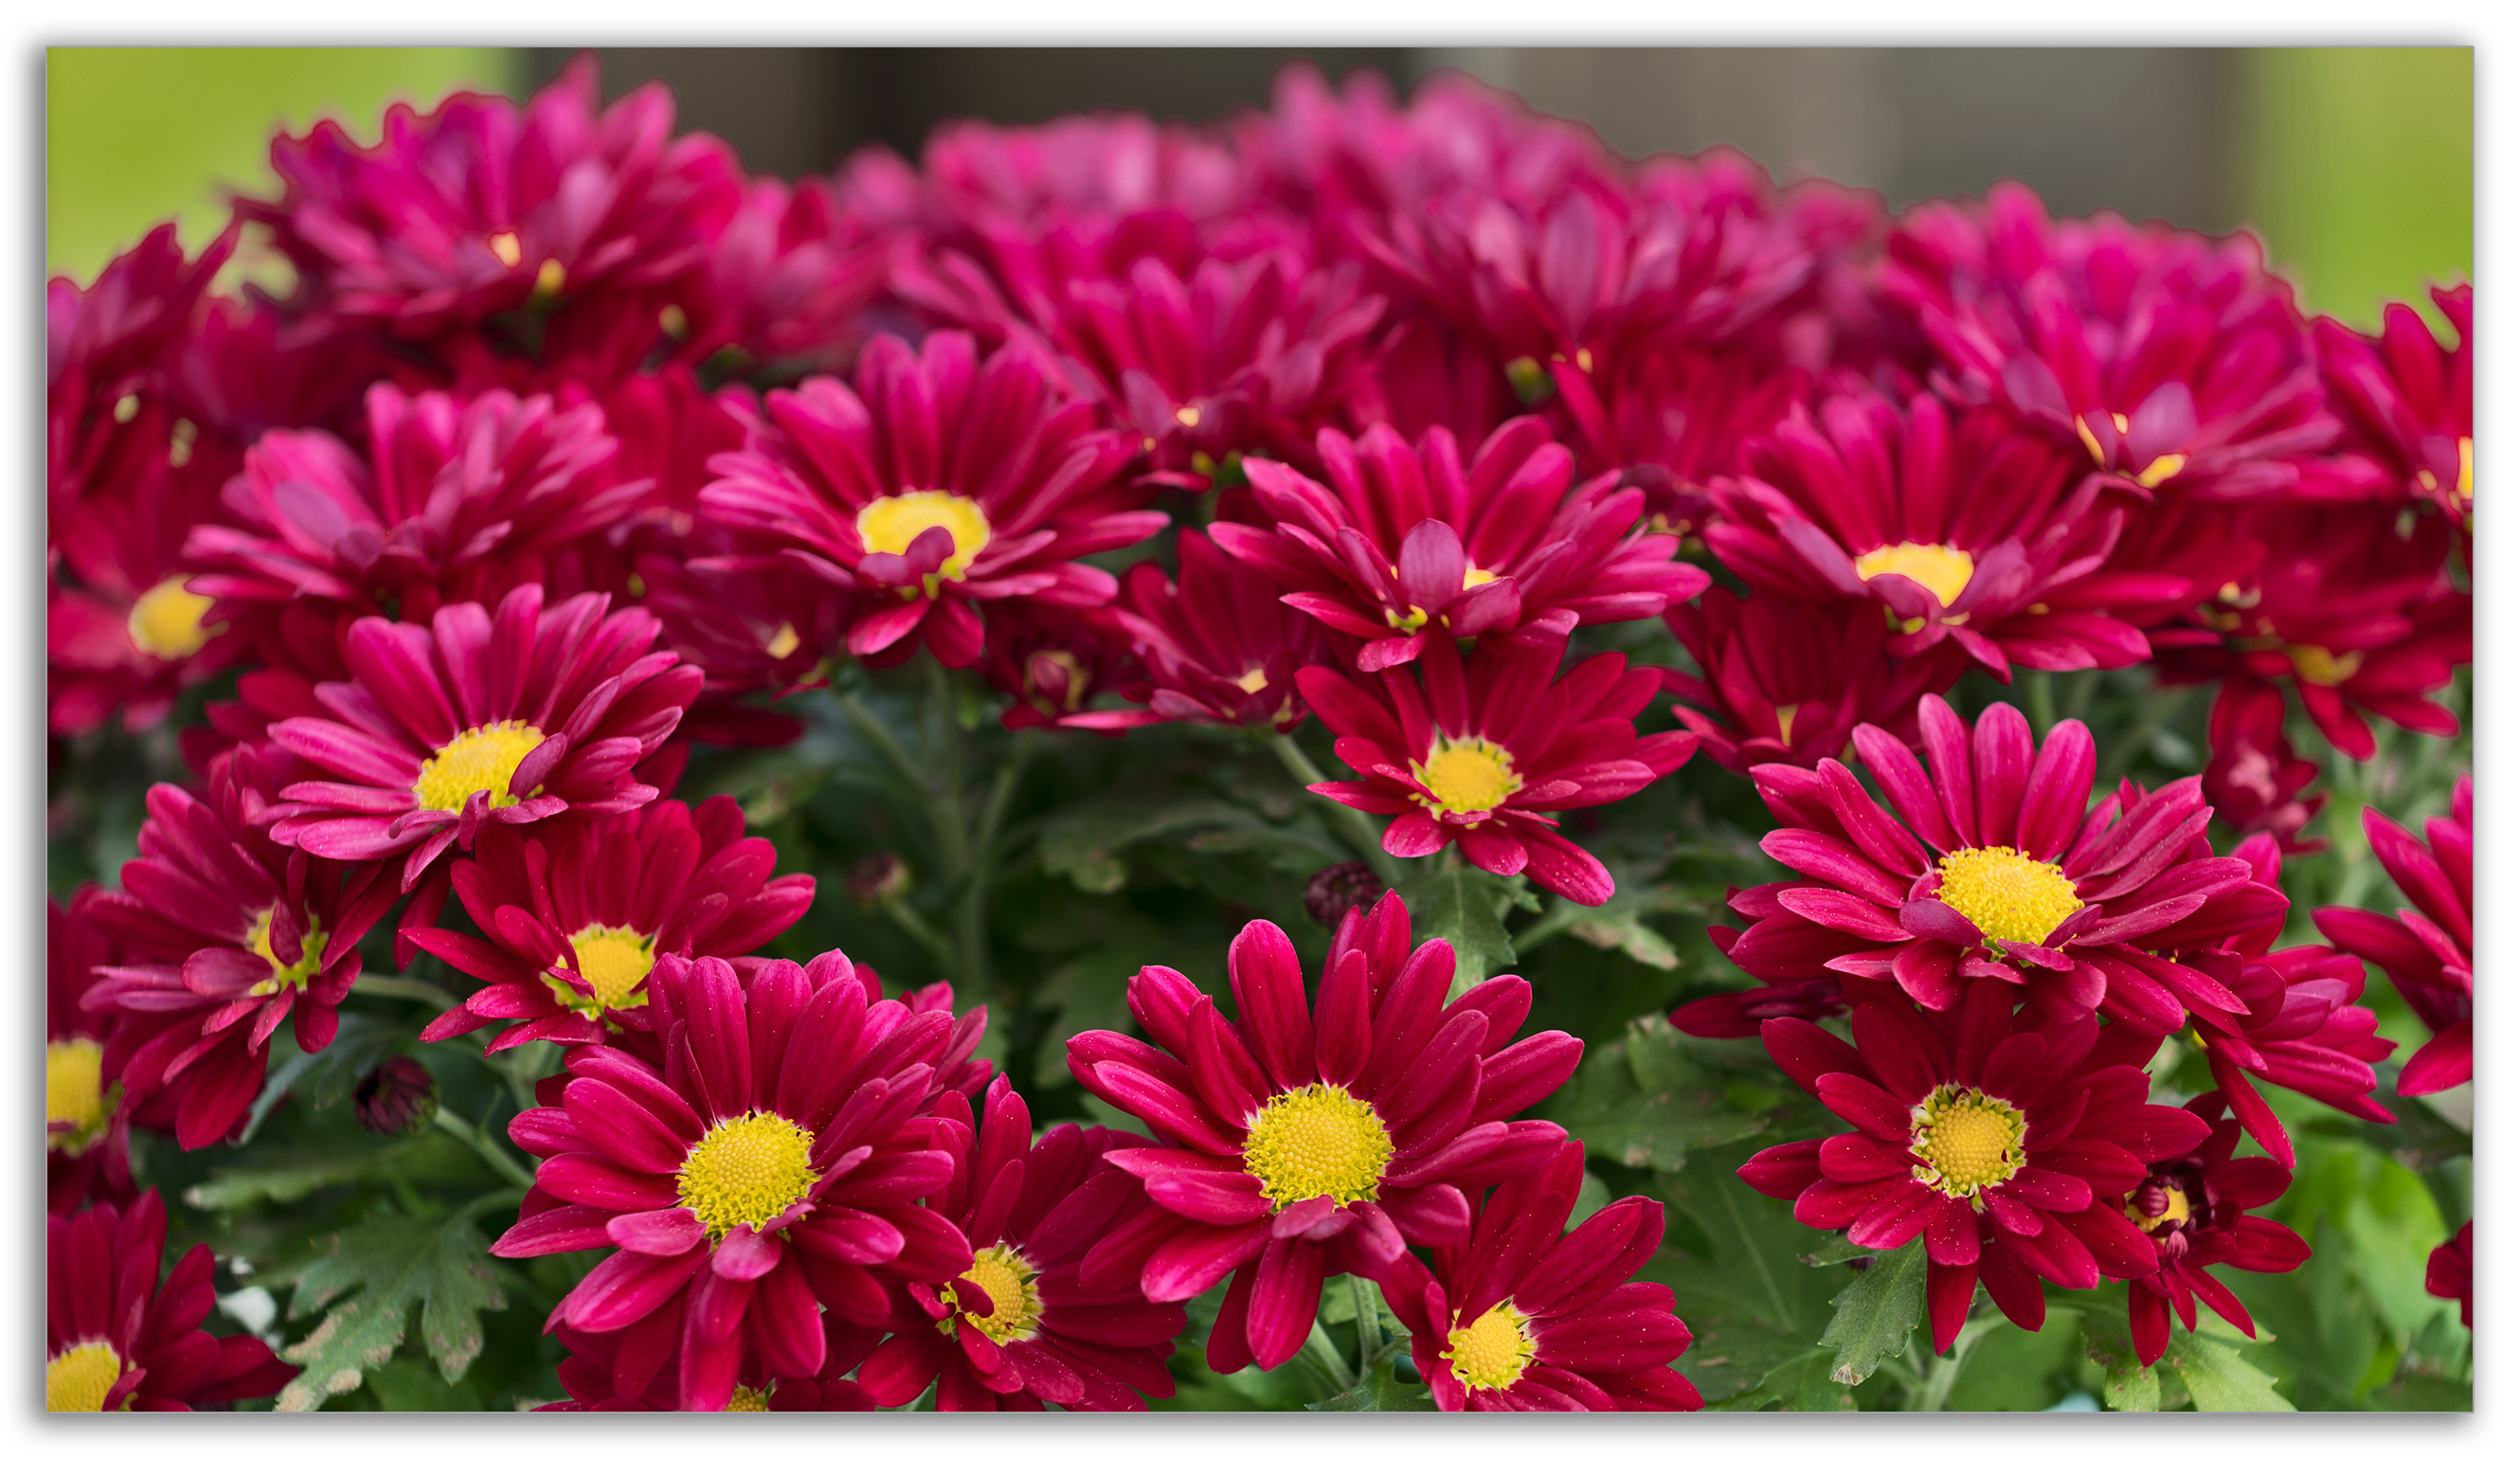
It’s not too difficult really, but it takes some experimentation to figure out how many shots it will take for any given scenario. Here’s a focus stack image, processed in Photoshop. It is comprised of 35 out of 40 exposures, but it took four attempts, starting with 12 exposures, increasing the number of shots until I got to 40 (see the paragraph below, “The number of shots”).
The second image is what it looks like with just one exposure focussing on the closest flower petals. Stopping down even to f/22 still wouldn’t have gotten all the flowers in focus, and the background bokeh would not be as pleasing.
The biggest problem with shooting outdoors is the wind. A gust can come up right in the middle of a 40-shot focus shift shooting and ruin the whole thing. Normally you would just go to a high enough shutter speed to stop the movement of the flowers but that doesn’t work in this case—a high shutter speed would stop the movement in different positions that would be difficult to align, so it’s no help.
When would you use focus shift? Anytime you need a photo that is sharp from point A (usually the foreground) to point B (usually the background or horizon) and you cannot accomplish that depth of field with an aperture that avoids diffraction, i.e., an aperture smaller than f/8.0-f/11.0.
-
Macro and extreme closeups
-
Landscapes
-
Panoramas
-
Product photography
-
Architectural and real estate photography
Using an aperture up to f/8.0 you can get each segment of the image in sharp focus without diffraction.
You set:
-
The number of shots from 1-300
-
The step width from 1-10—4 or 5 is recommended
-
Interval until next shot – leave at zero unless using a flash
-
Exposure smoothing – enable it in case there’s any fluctuation in lighting
-
Silent photography – enabled for sure
-
Starting storage folder – enabled
The number of shots—as Nikon suggests, you may need several hundred exposures if you’re shooting a close-up of an insect with a macro lens. I haven’t taken any macro shots yet. Focus shift starts wherever you have your focus set and then clicks out to infinity taking as many shots as necessary to get to infinity, unless you have it set for fewer shots, as necessary when you don’t want to go to infinity. For example, the flowers photo above was ultimately set for 40 shots. Had I set it to 300 it may have taken 100 or more until it got to infinity. So this is something you have to watch out for.
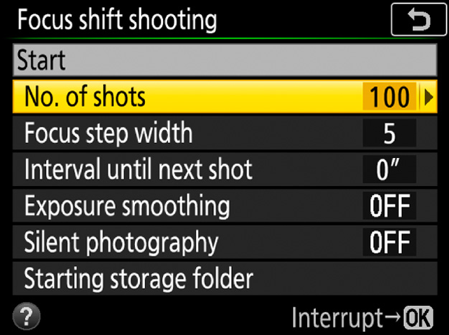
The focus step width—this setting is a little confusing and Nikon doesn’t really provide a technical specification nor comprehensive description of it, saying only “focus distance changes with each shot. The options available range from 1 to 10: choose lower values for smaller steps, higher values for larger steps.” Steve Perry explains this one in his D850 review on YouTube, saying, “it should have been called the sharpness overlap setting.” In other words, it determines how much of an overlap you have with each shot. I’m still a little confused, however, but I’ll take Steve’s advice and keep this setting at “4”, but you’ll need to experiment with this to find what works best.
I would assume that if you choose “1” it is going to take small steps and thus require more shots and they will all overlap more than necessary, and conversely “10” would require fewer shots, but there may be gaps in focus between the shots. Again, it seems that the camera could make this setting automatically so it’s hard to fathom Nikon’s thinking.
Interval until next shot—Leave it at zero unless you’re shooting with a flash that requires some recycling time. For anything else you don’t want an interval between shots as light and wind can change in between each shot.
Exposure smoothing—this setting will try to alter exposure settings if the light changes in between each shot, making each exposure the same as much as possible. If you’re shooting at a higher shutter speed this probably won’t be necessary, but I just leave it on all the time.
Silent photography— Shoot in Live View and turn this on. It will eliminate any shutter shock and noise.
Starting storage folder—If you’re using the default storage folder name, i.e., 100ND850, this creates new folders specifically for each focus shift shooting, starting with 101ND850 and will number each subsequent folder sequentially— 102ND850, 103ND850 and so on and it will remember where it leaves off the next time you start a focus shift session. I have this turned on and it seems to work well and makes it easy to find a focus shift shoot.
This setting also gives you the option to “reset the file numbering” with each focus shift shoot with files numbered from 001 and up in each folder. I have this turned off to continue numbering from the very first shutter click I made when the camera was new as I like to know the approximate total number of actuations of my D850 and it keeps all shots in a continuing sequence.
Let’s talk about computers. What a lot of reviews of the D850’s new focus shift feature don’t talk about is what it takes to process a stack of focus shift images—it takes a powerful computer with a lot of memory, substantial VRAM and a fast drive (SSD or RAID). Otherwise each process in Photoshop or Lightroom is going to take a while and the slower the computer the longer it will take.
This what it took to process the above stacked image comprised of 35 RAW files averaging around 50 MB each, time-wise:
-
Load files into Stack with Alignment: 00:10:09
-
Create Group and Blend: 00:03:30
-
Additional exposure adjustments and cropping: 00:10:00
-
Total: about 23½ minutes.
That was performed on my 2012 Mac Pro that has a 3.46 GHz 6-Core Xeon processor, 32 GB of RAM, 4 GB of VRAM, a 500 GB solid state blade drive via PCIe for the boot drive, a 1 TB RAID for images, and an additional 6 TB of solid state storage and back up. It’s a powerful computer—not as powerful as many newer Macs and PCs, but very powerful nonetheless.
My second Mac is a 2011 MacBook Pro with a 2.8 GHz Core i7 processor, 16 GB RAM and a 500 GB SSD—still a very powerful computer for most applications and processes. What takes 20 minutes on my Mac Pro can take 30-40 minutes or more on my MacBook Pro.
Focus Stacking in Photoshop
In Photoshop go to
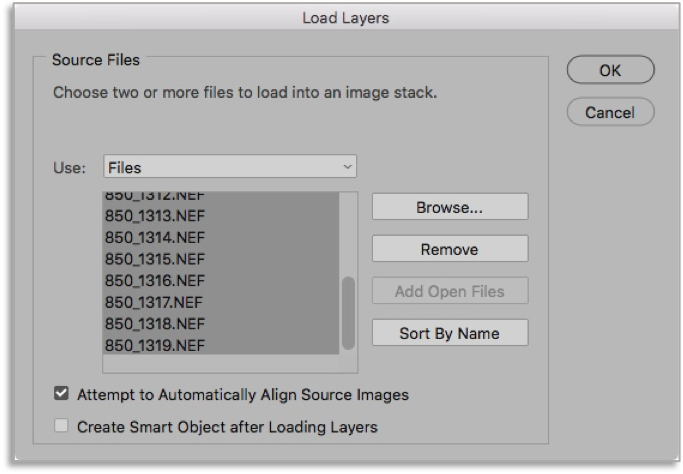
File Menu > Scripts > Load Files into Stack
In the ensuing “Source Files” popup window, browse to the folder with your focus shift images and choose all the ones you want to include in the stack and click “open.” Here it is at that point:
I check the box to Attempt to Automatically Align Source Images as that will save having to do that later. Do not check Create Smart Object… Click OK.
Now open your Layers window and select all layers.
Go to the Layers menu and click New Group from Layers. This puts all the layers into one folder. With the Group folder selected go to
Edit > Auto-Blend Layers…
and choose Stack Images with Seamless Tones and Colors checked.
Once Photoshop has completed the blend you will have all the layers linked and masked into one composite. You can flatten the image at this point.
Next you will need to crop a little or a lot depending on how much difference there may have been between each layer when aligned.
You might be thinking it would be a lot faster to shoot JPEGs and stack them instead of RAW images. I thought so. Yes, it is faster, but you may not get what you actually shot unless you have your D850 set up very precisely to process JPEGs straight out of the camera. It’s certainly worth trying.
The effect of wind on a stack of focus shift images. I mentioned earlier how wind can come up and ruin everything. Here’s an example of what you get when the wind decides to spoil your party.
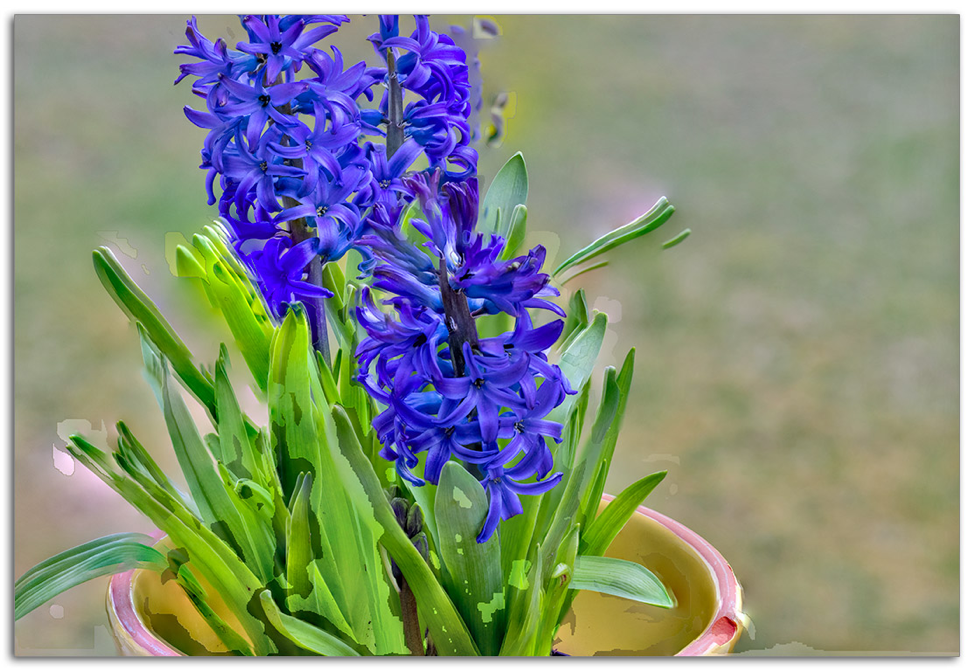
You can see what a mess the wind made of the leaves. Photoshop aligned the flowers first and then tried to align the leaves but it couldn’t do it and thus you see the results. It’s really important to shoot when there is no wind when shooting things like trees and flowers and scenes with clouds or flowing water. However, that said, it doesn’t hurt to experiment, y0u might wind up with something abstract.
You do need to consider your composition carefully when setting up. A lot of times you do not want the background in focus, or some other area, like the foreground perhaps. Once you’ve created a series of focus shift photos you will need to look at each one on a screen larger than your D850 and figure out where to begin the stack and where to end it. Often you will leave out some of the last shots, but sometimes even the first couple shots may not work in the series. It’s something you have to decide.
In conclusion—here are some key points to keep in mind, although some things probably go without saying:
-
Always use a tripod
-
Shoot in Live View if possible, with silent shooting turned on
-
Consider your lighting, shade, shadows and bright spots
-
Beware the wind
-
Set your exposure manually unless there are changing lighting conditions, then set to Auto
-
Set ISO manually not with Auto ISO
-
Use an aperture 1-3 stops smaller than wide open
-
Focus your first shot manually (zoom in for more accuracy)
-
If you’re shooting from a foreground all the way to infinity, set the number of shots to 300, it will automatically stop at infinity
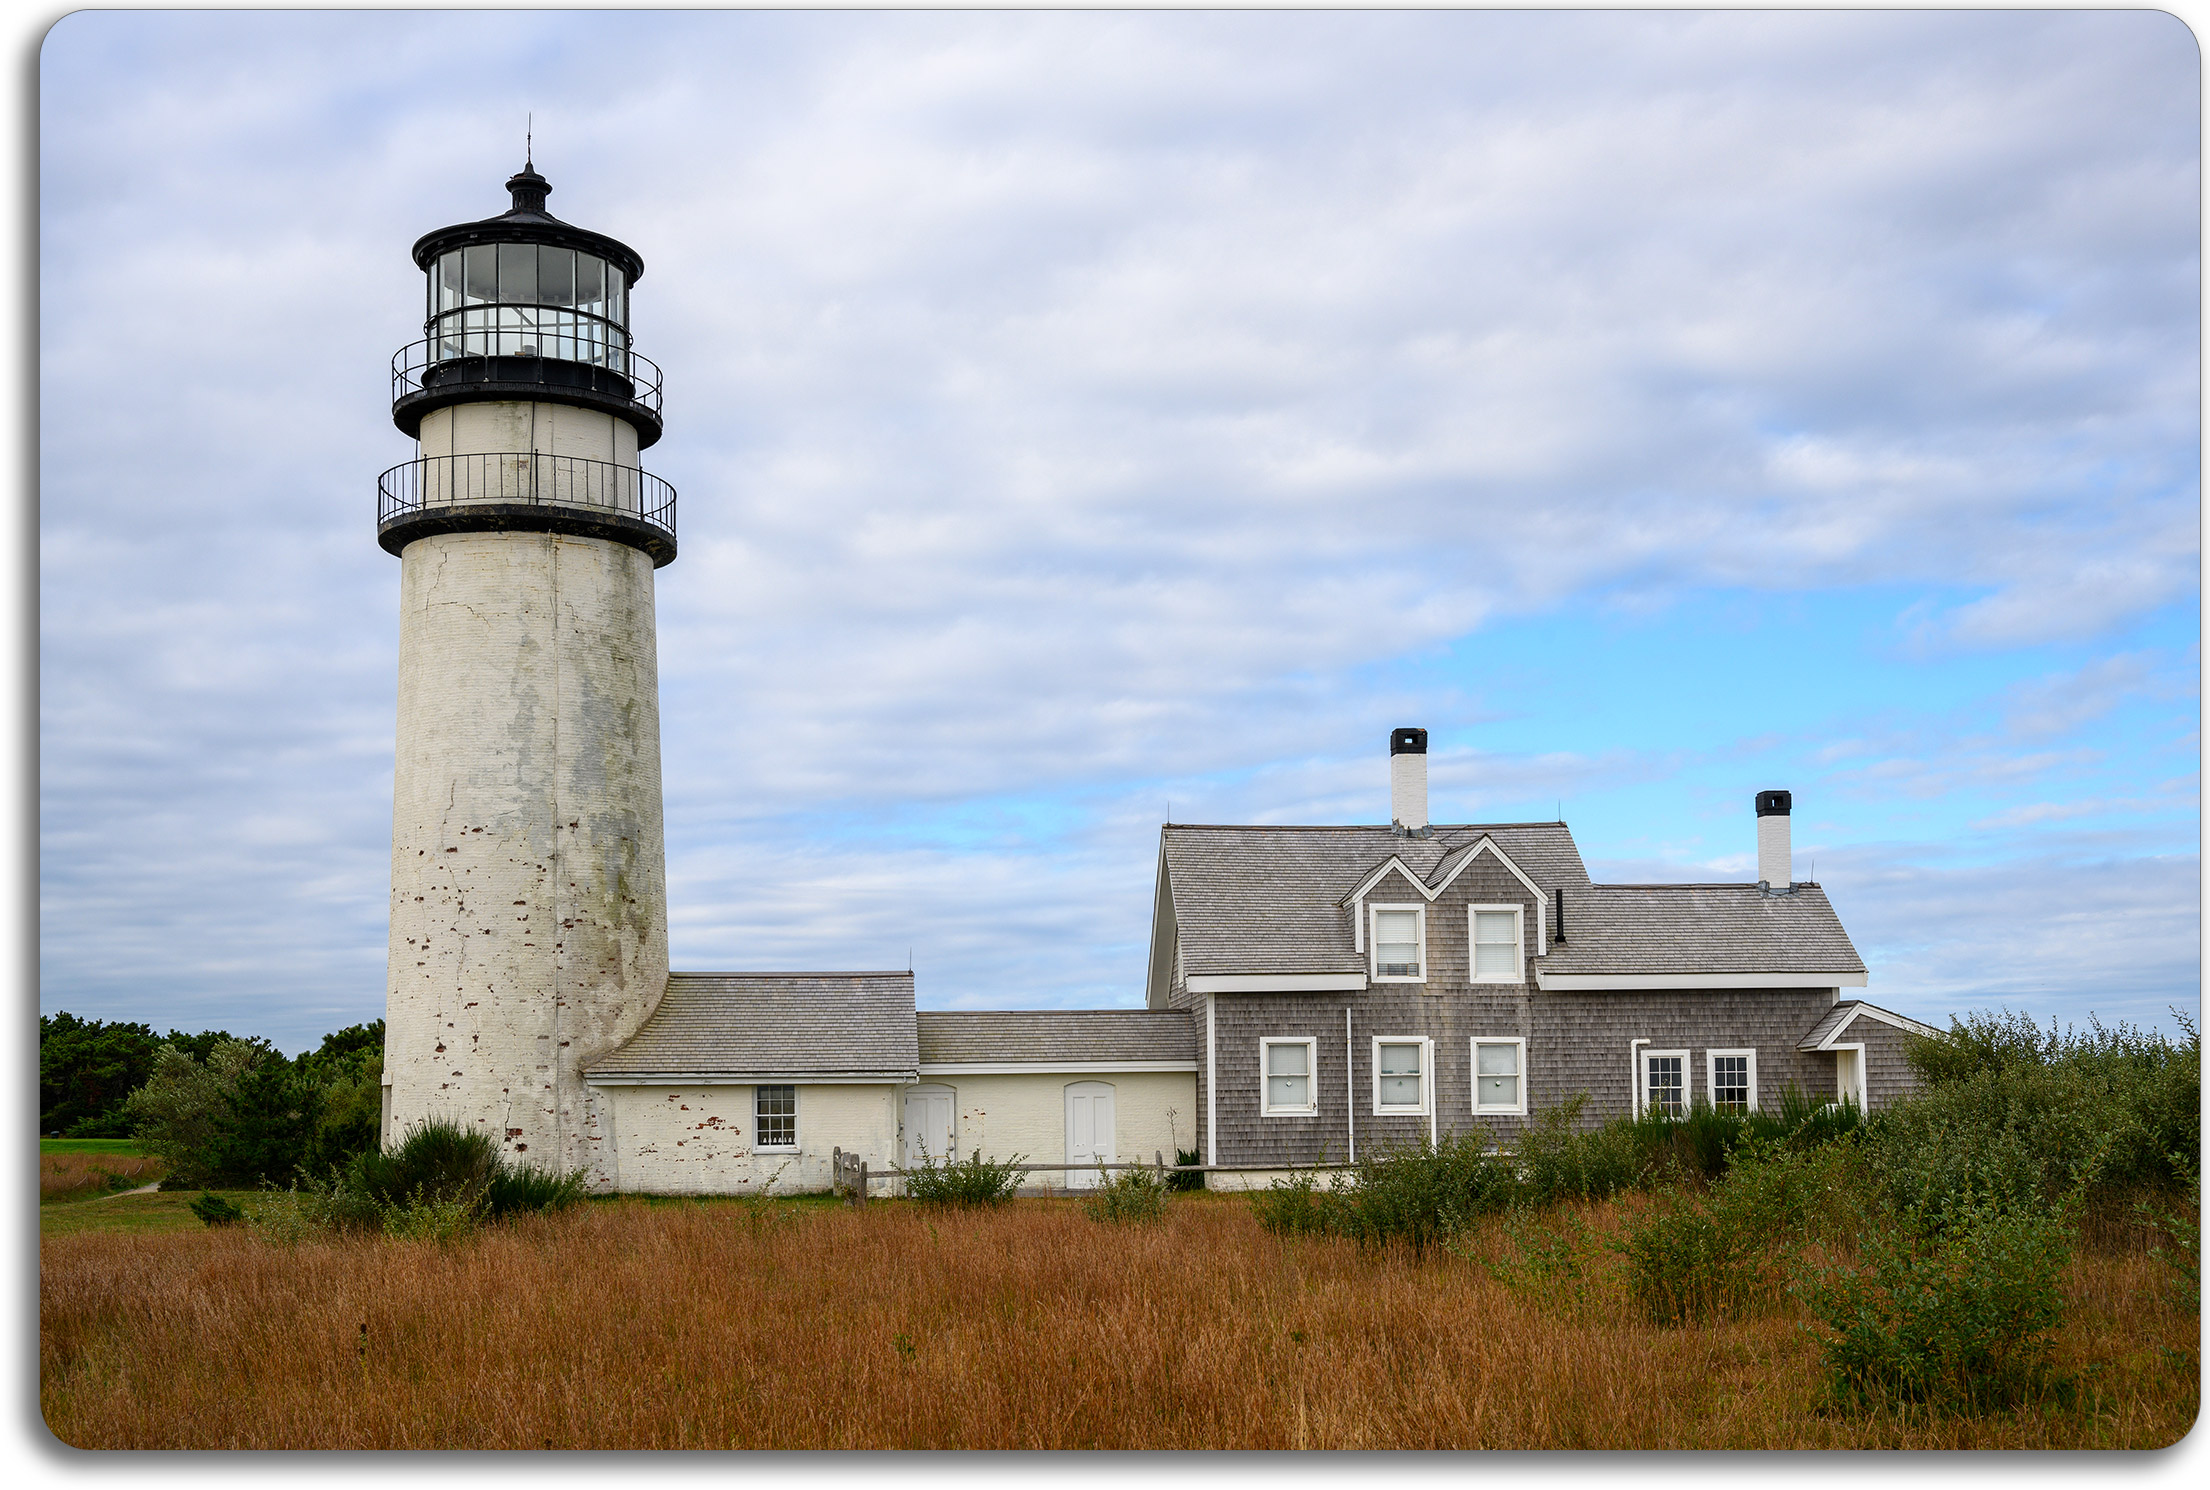
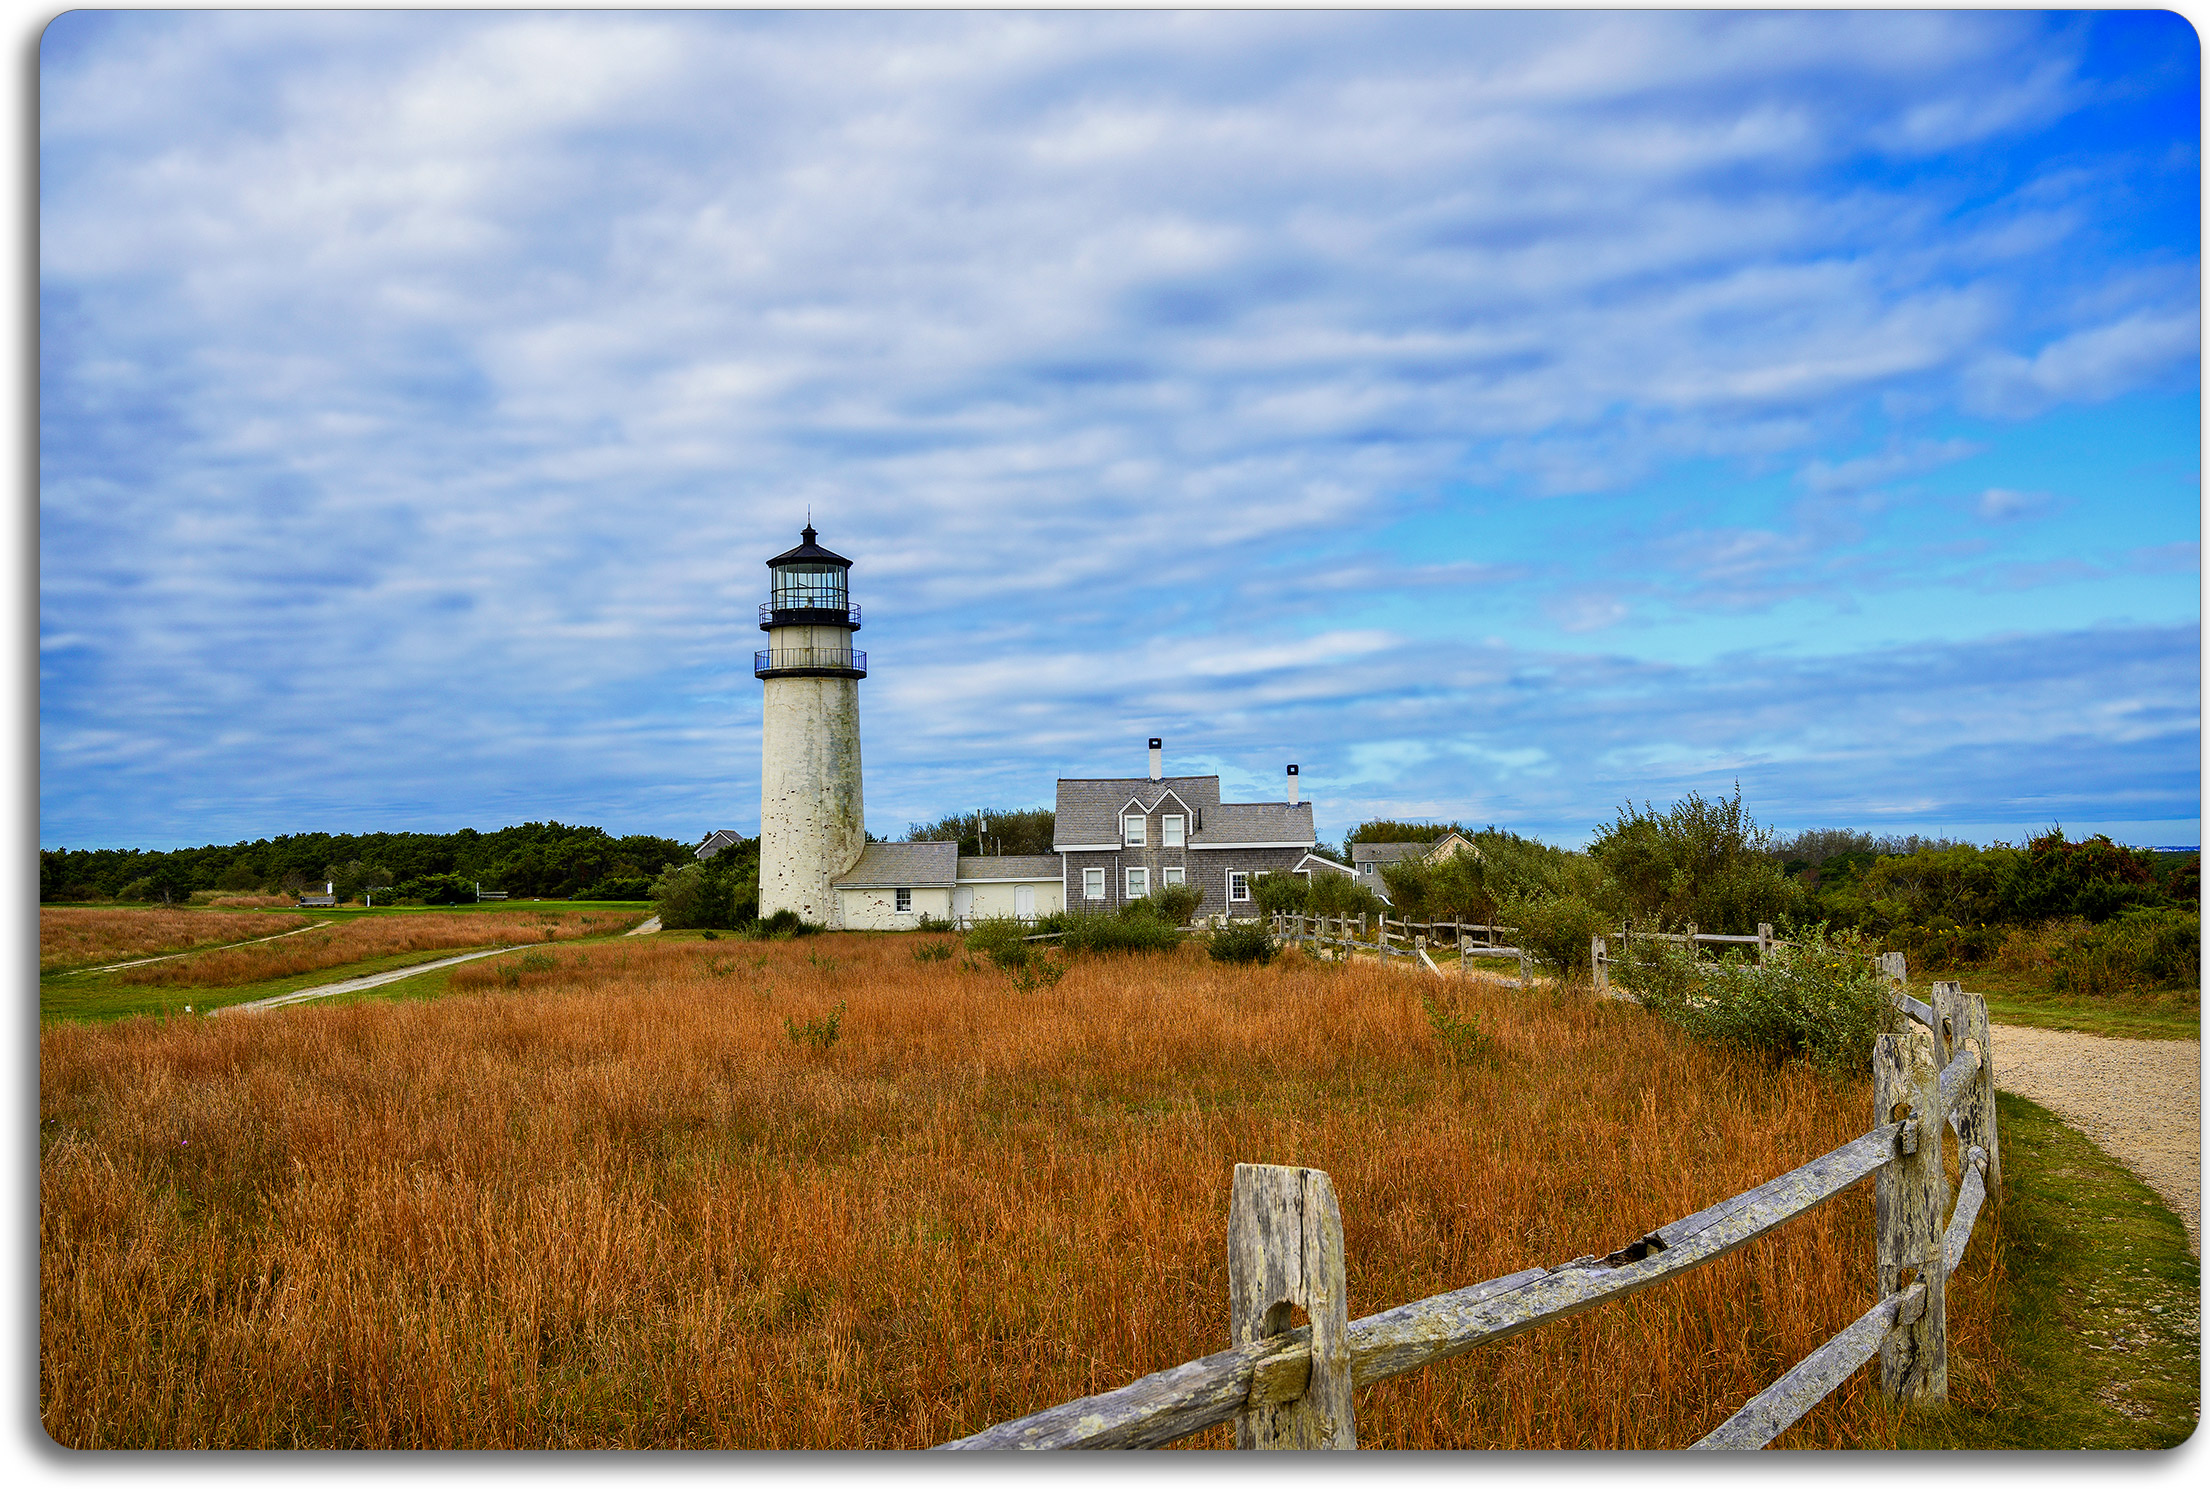
Where Focus Shift shooting will really excel is for landscapes and macro photography.
And here’s the same image blended from eleven stacked images. In this case having the foreground leaves and branches in focus works.
Further thoughts and more examples.
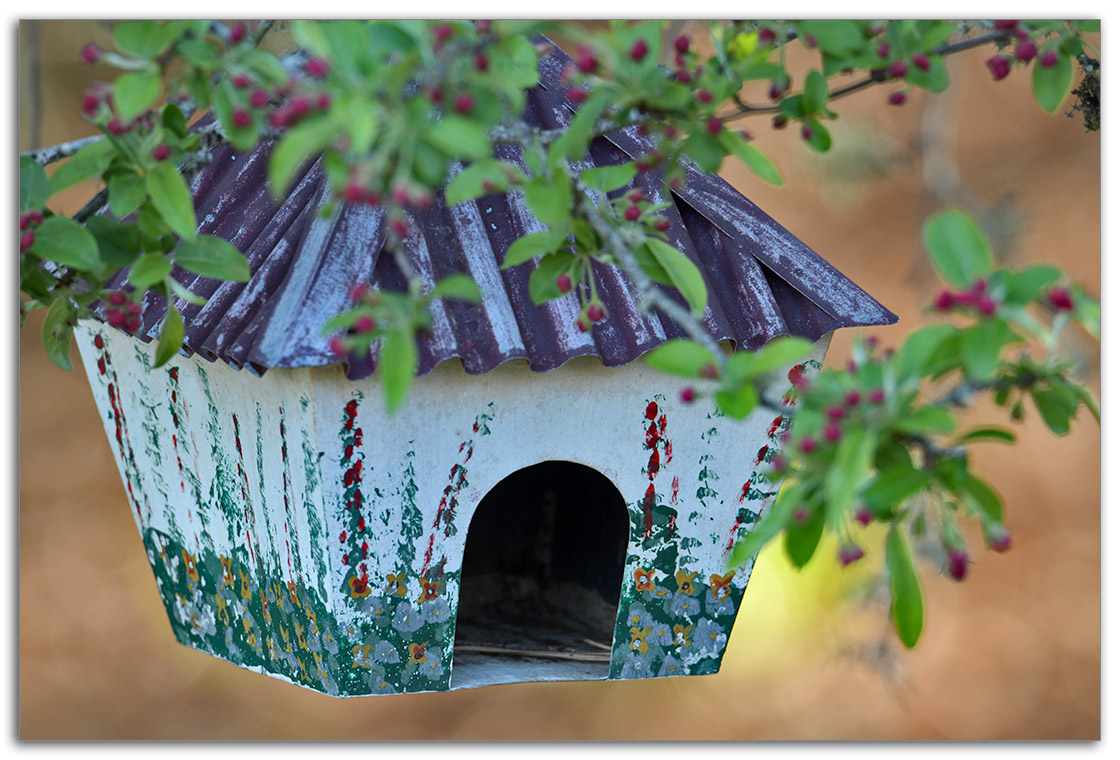
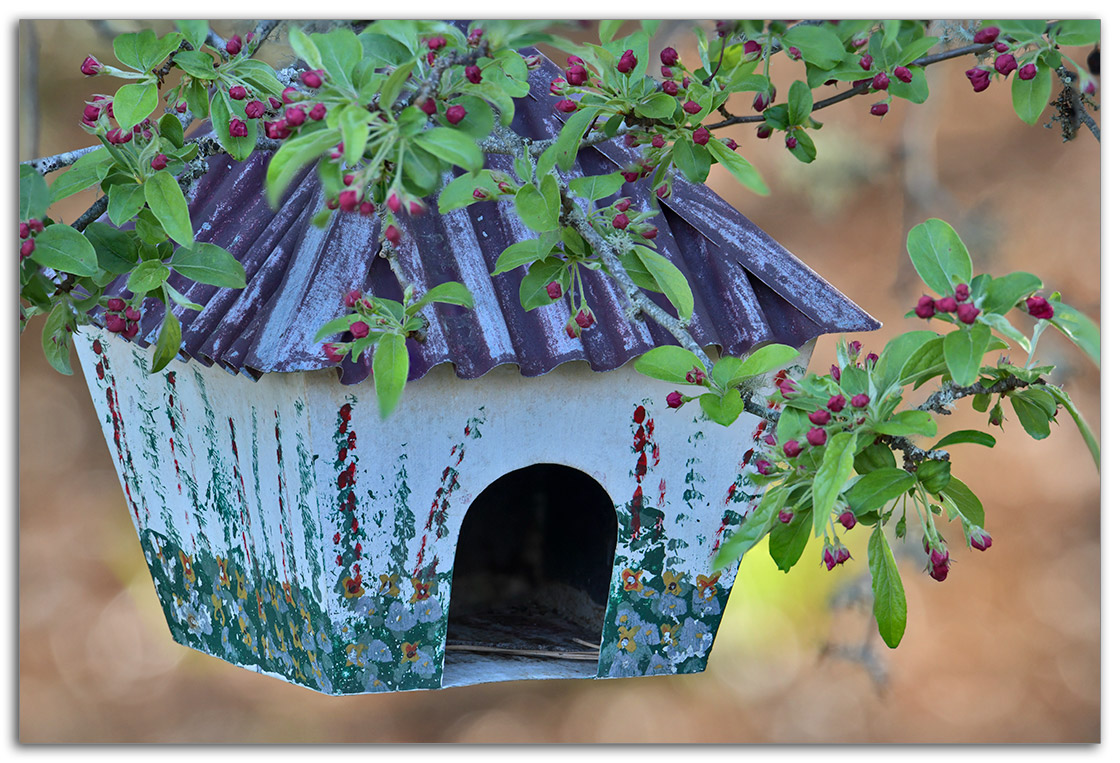
Someone asked me, “Why not just stop down to, say, f/22?” It’s a sort of a good question, except when you stop down to f/22 or more you are going to see softening of the image due to diffraction. Below are some examples of stopping down. Keep in mind, however, that each image you create using focus shift is going to depend on the lens you use, the subject matter and lighting. You can see from the above images that I was only able to get the birdhouse in focus in the first one at f/8, and that was using the hyperlocal distance for my focal point—it just wasn’t enough depth of field.
I’ve heard it said that in macro-photography you can get away with stopping down. That was somewhat true back in the days of film, but it’s not true today using the latest sensors in DSLRs. And that’s why the focus shift feature of the D850 is so very useful. Now, as I have mentioned, you can shift focus manually but it will take a lot or practice and perhaps a lot of shots to figure out where to focus as you shift focus. It will be nearly impossible with lenses that do not have a distance scale, like the new Nikon 70-300mm AF-P lens. Using focus shift on the D850 makes it easier, but you still may have to take a a few different series of shots to get what you’re looking for.
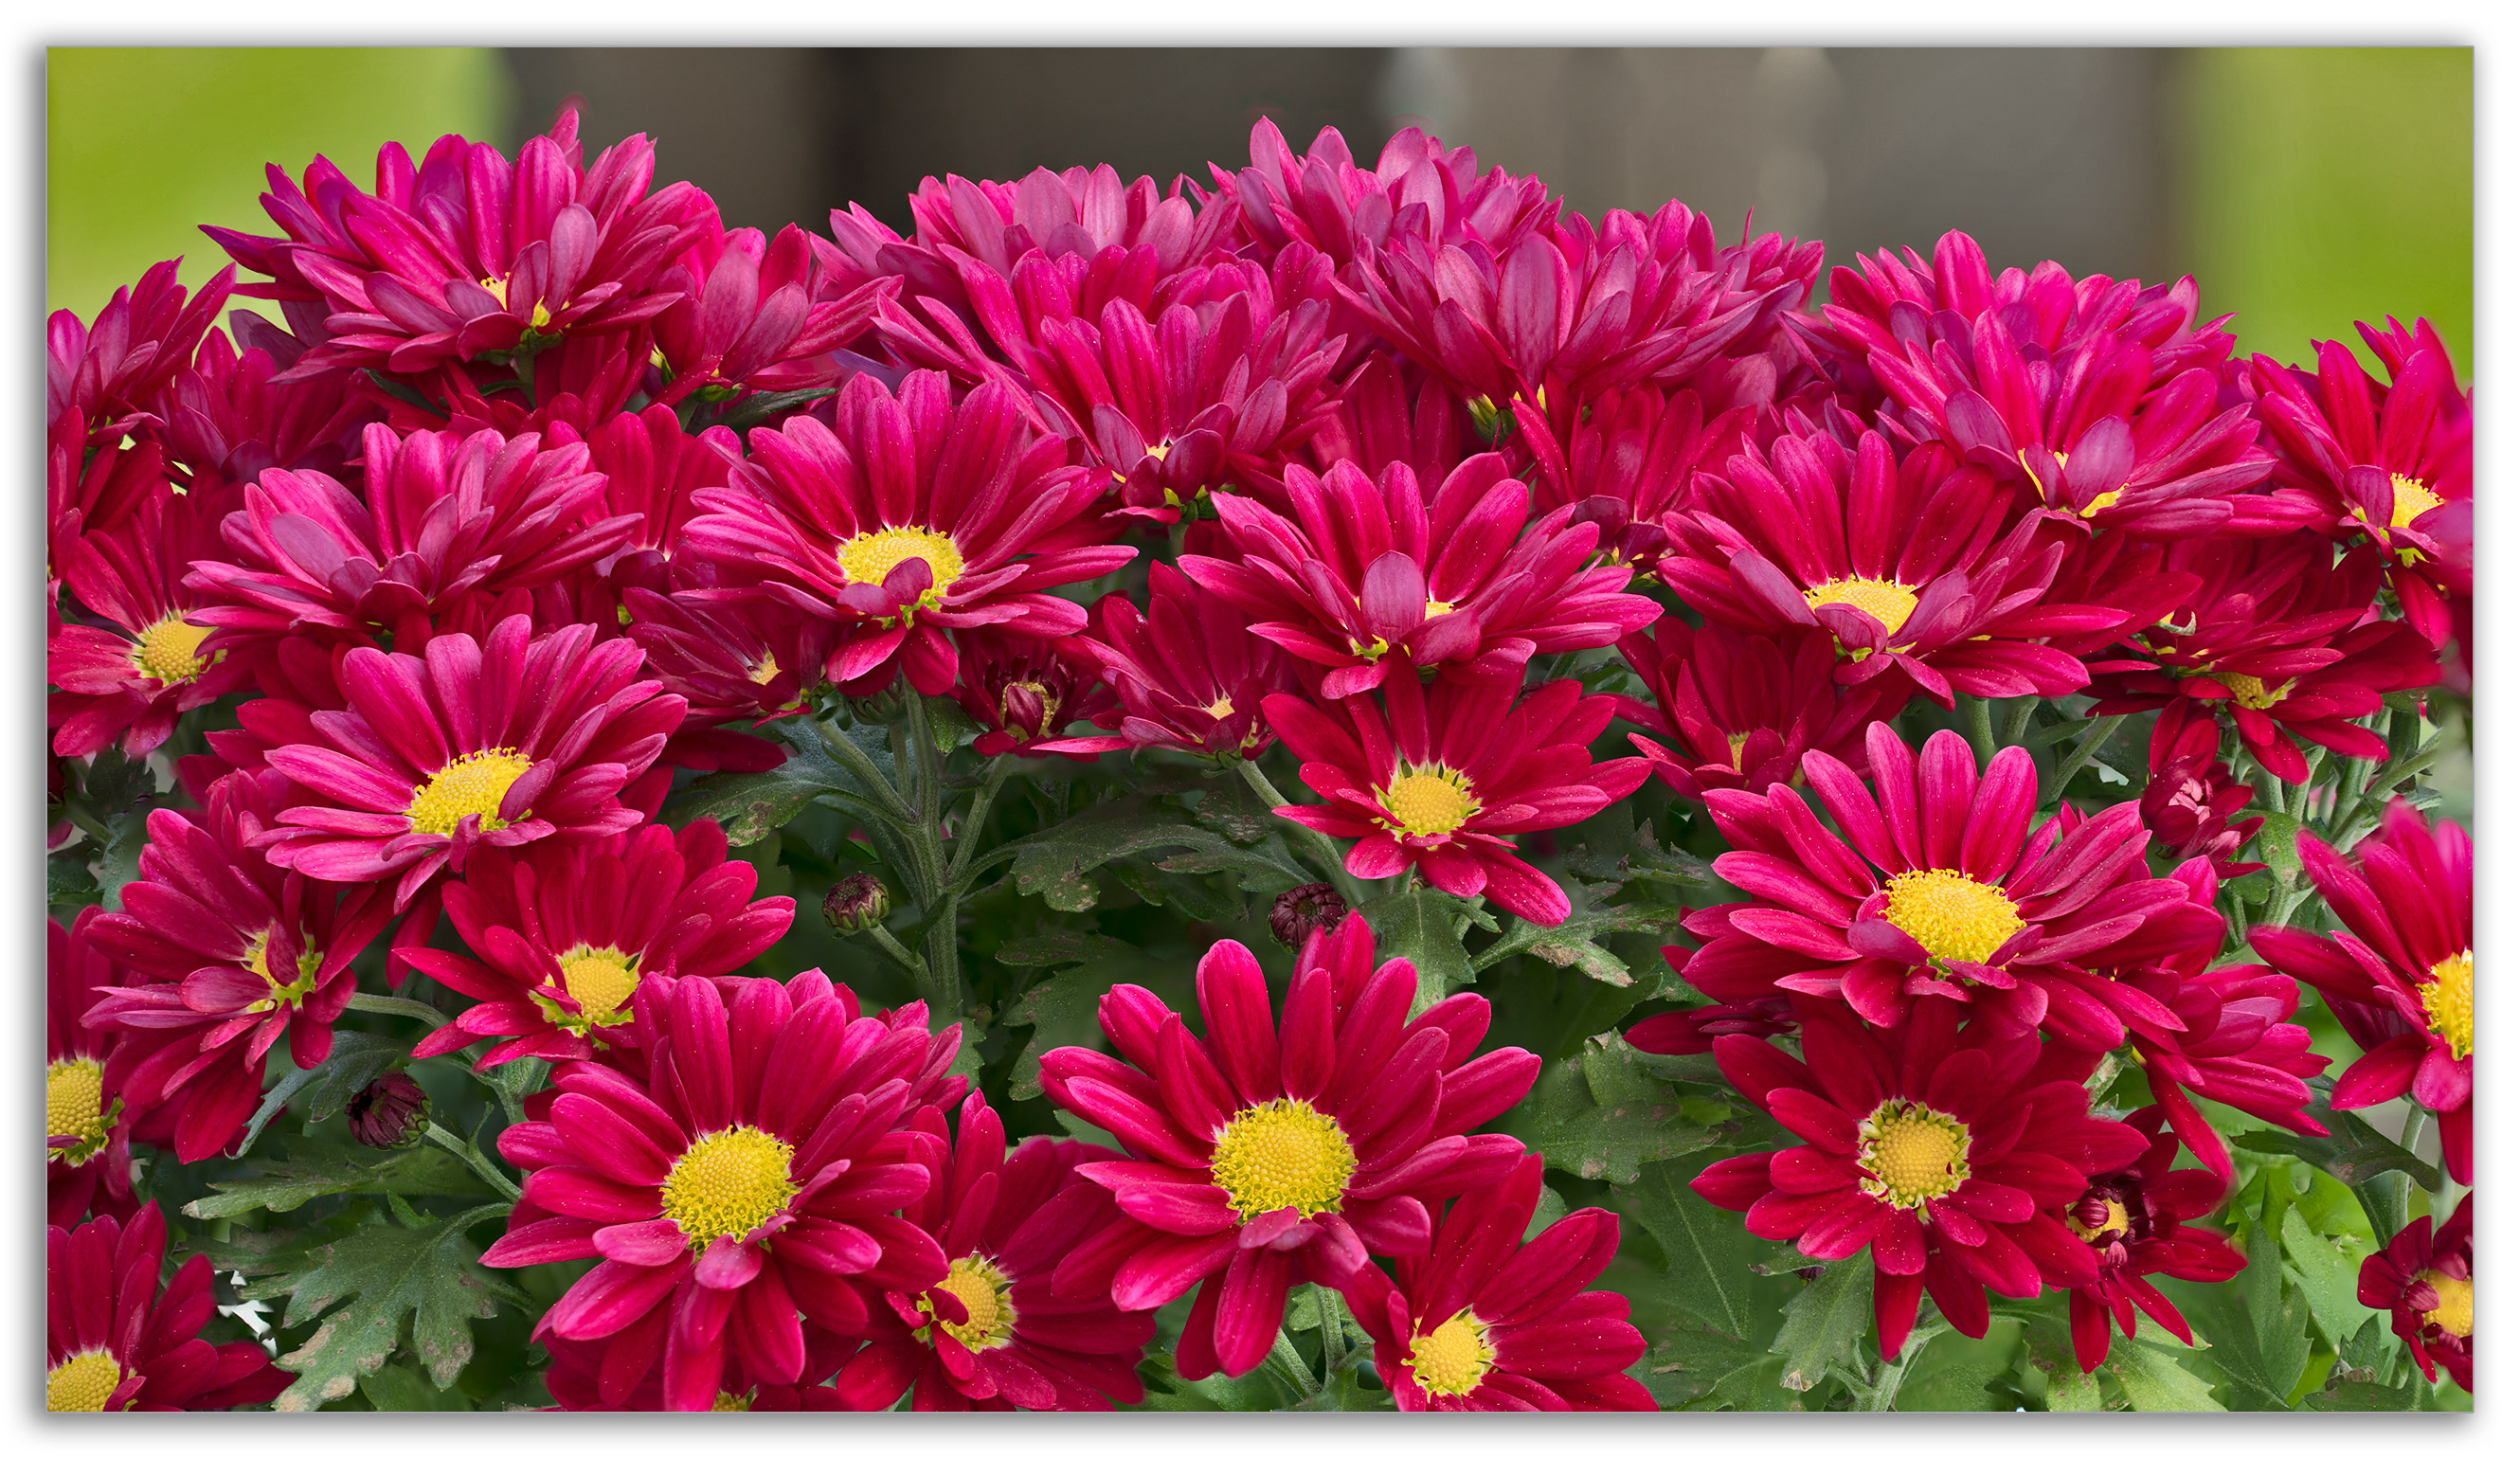
Much is also going to depend on what you want to have in focus. In most cases when shooting macro or other close-ups I still want the background to be creamy soft. If you use a lens and shoot at 1-2 stops from wide open you can achieve a nice background. Even if your stack of focus shift images goes beyond your subject and brings the background into focus, you can not include those when adding to your stack in Photoshop. So let’s take a look at some closeups using a Nikon Micro-Nikkor 60mm lens, using focus shift and then the same subject shot at f/22.
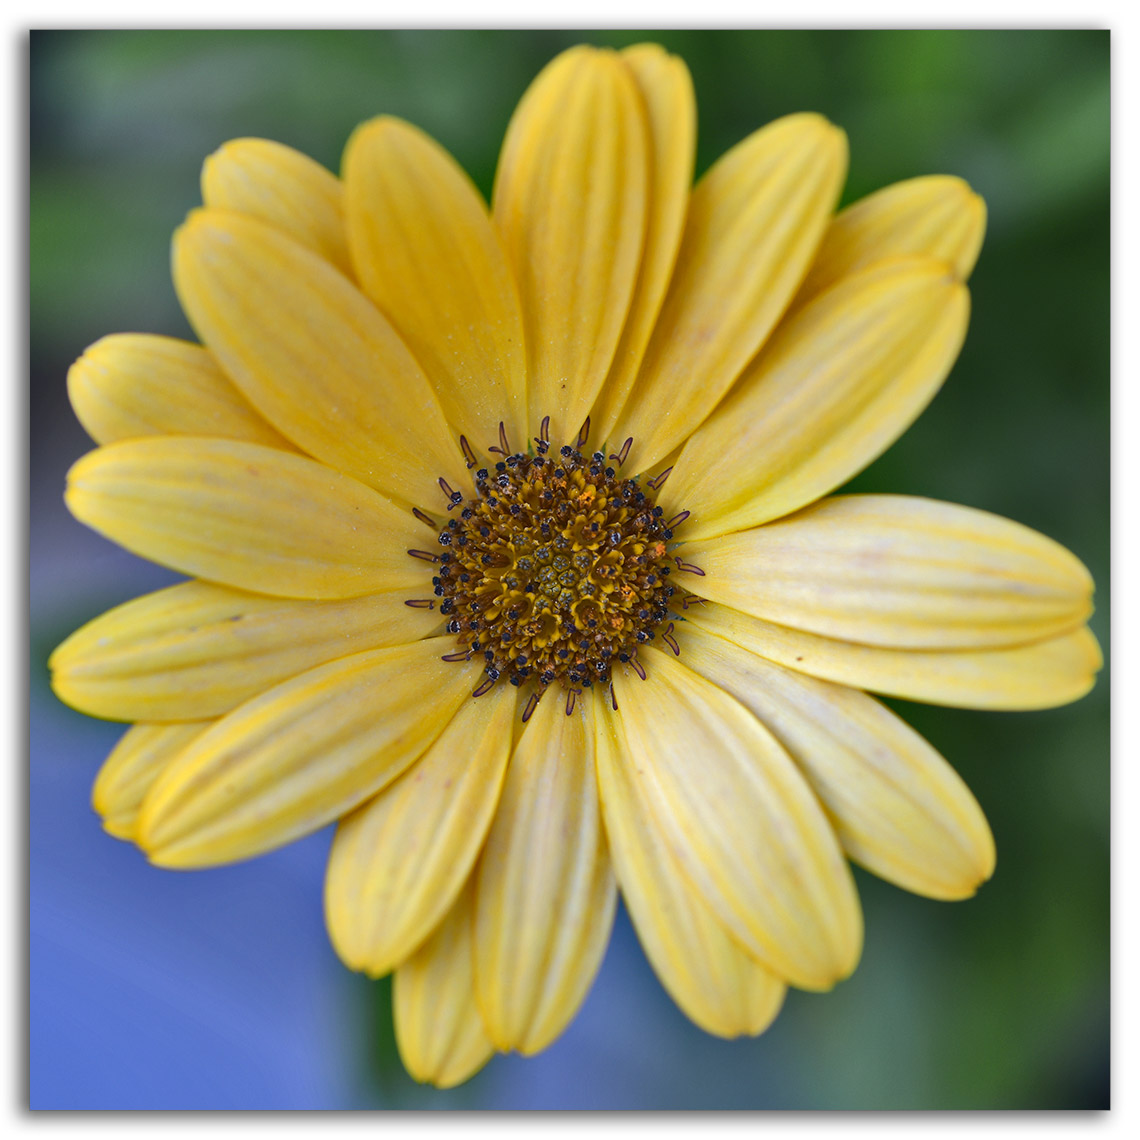
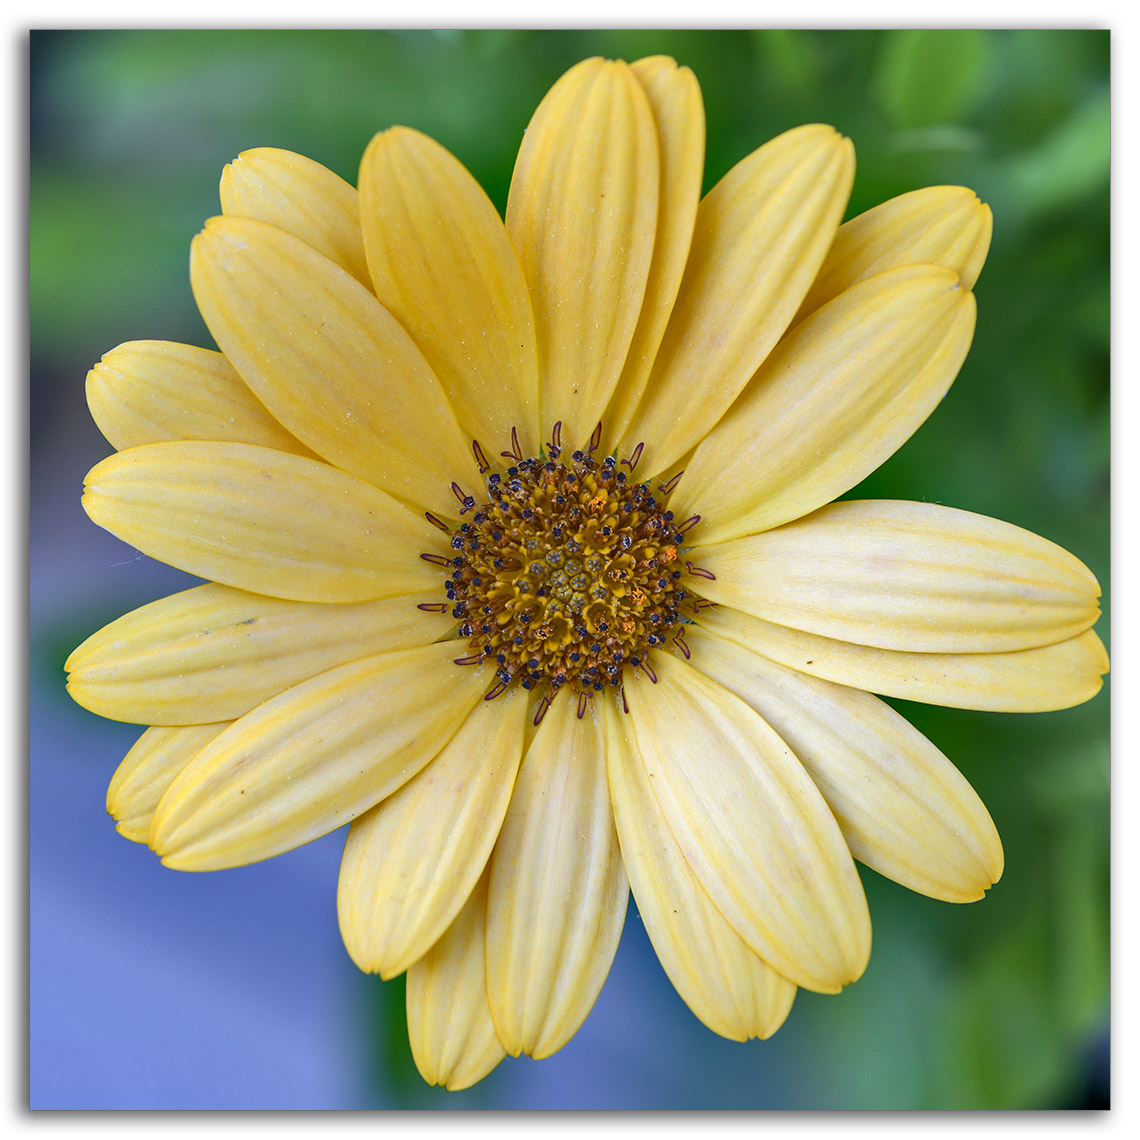
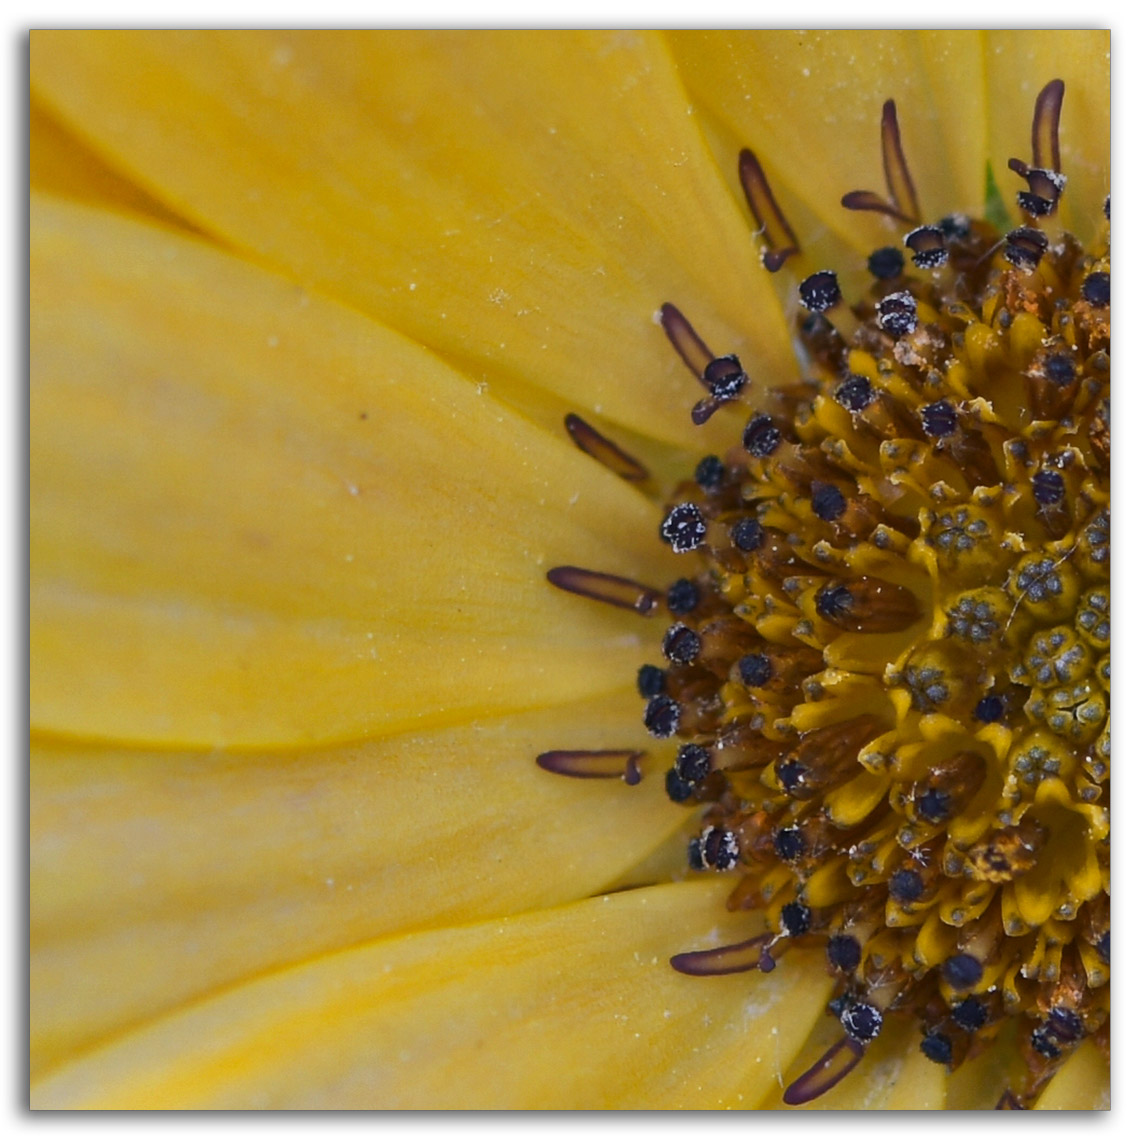
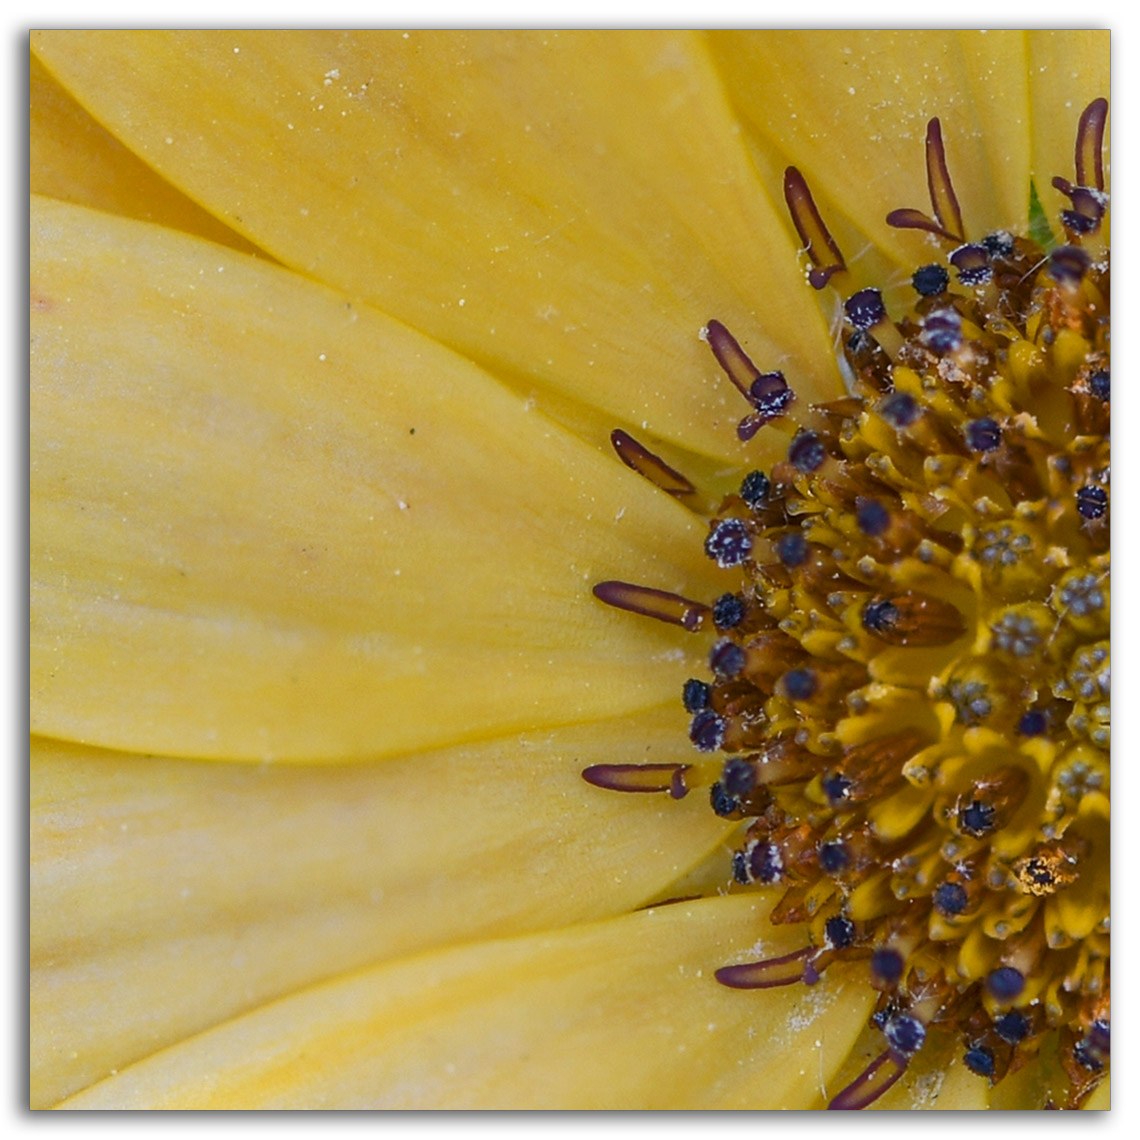
You can clearly see that the focus shift image is sharper, all parts of the flower are in focus while the straight image at f/22 has only the center in focus and the petals are soft.
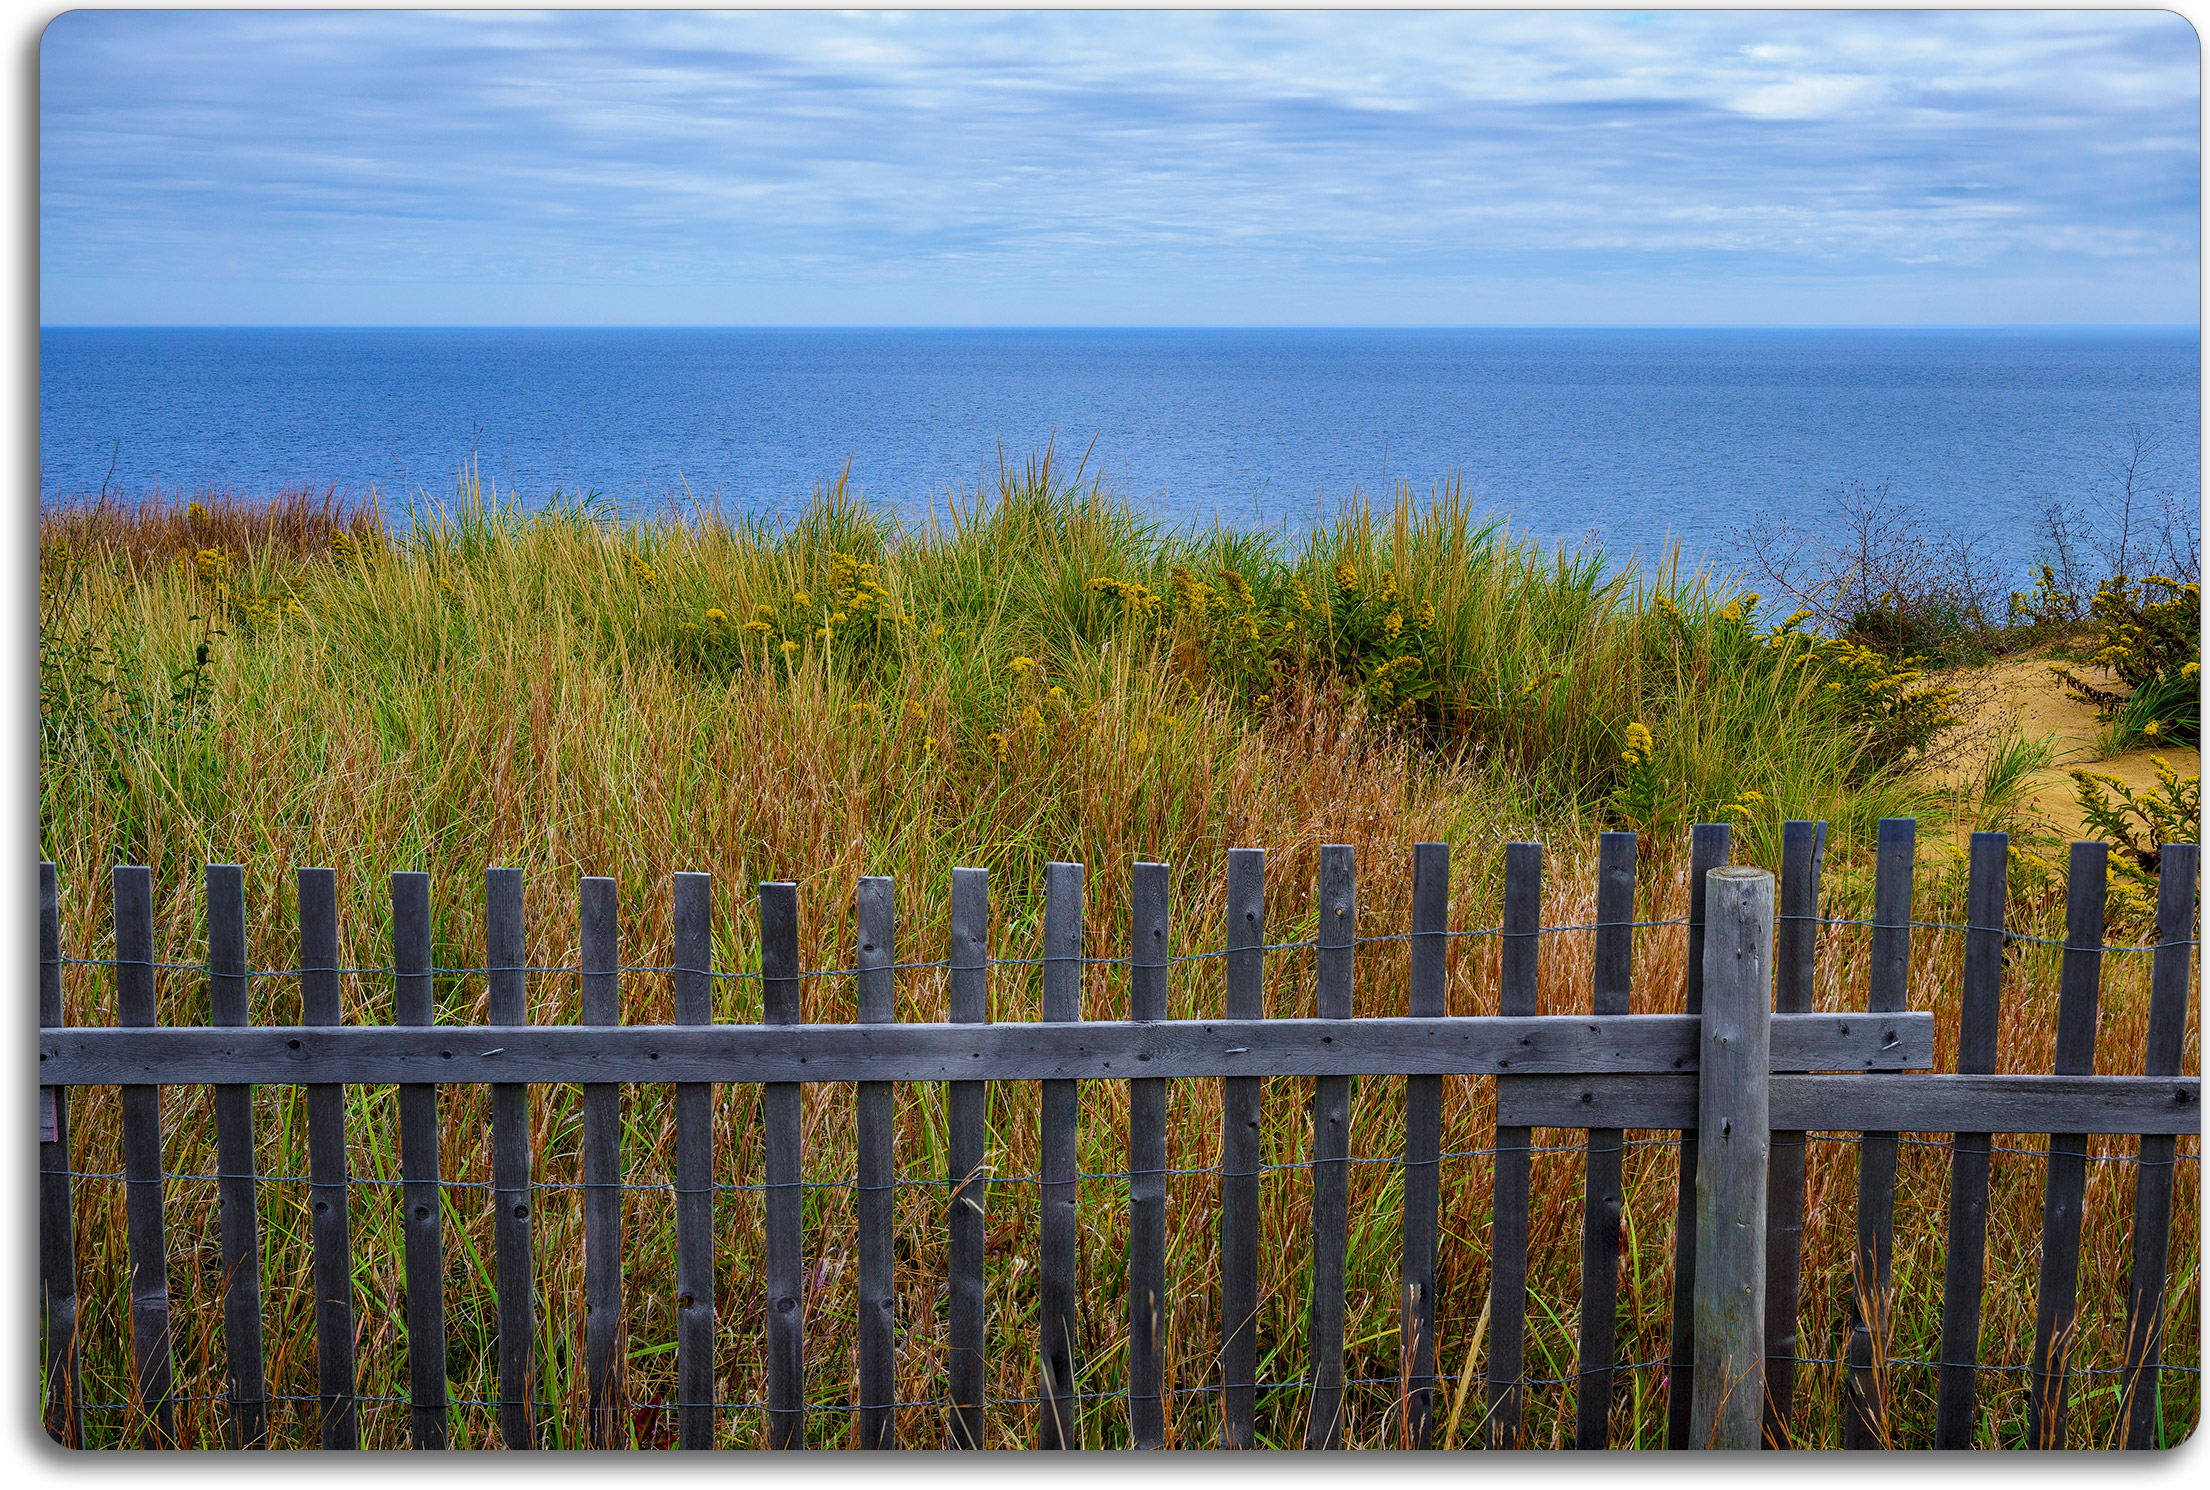
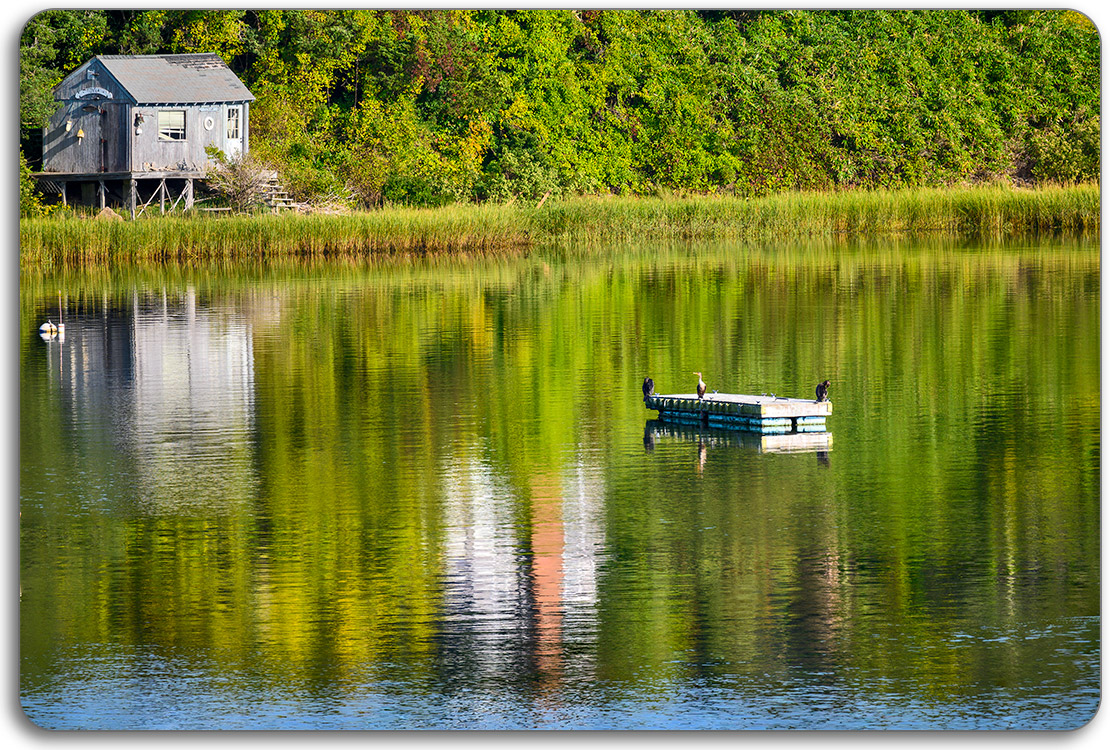
Focus shift shooting is probably best suited for landscapes and seascapes, as is the Z6 and Z7. The following focus-shift photo was taken with the z6.
More Examples